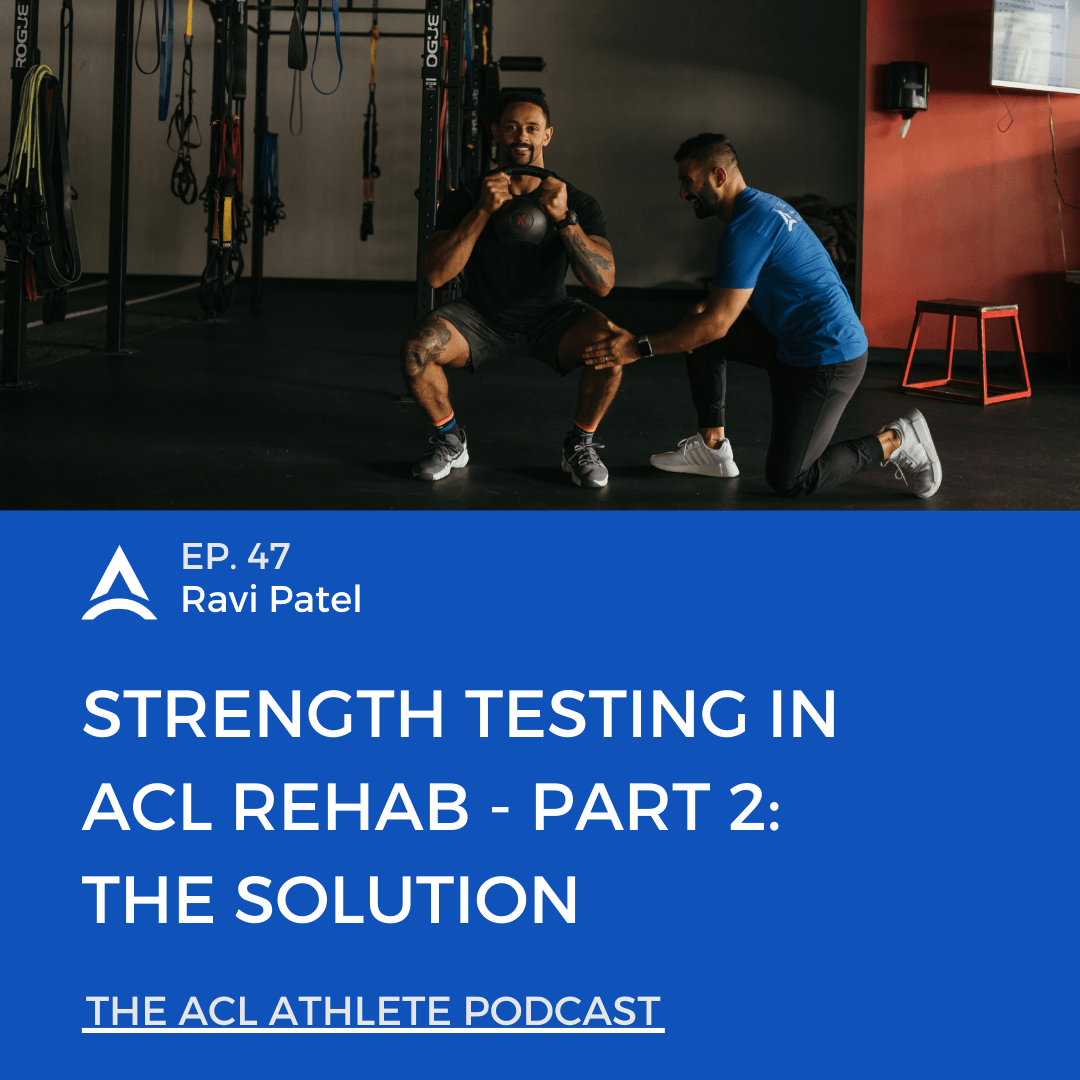
Show Notes:
In this episode, we discuss practical solutions to objectively test your strength in ACL rehab. We cover the why (part 1), what are your options, what’s most practical, when to test, how to test, principles important to testing, and what the numbers mean. There’s also a sweet bonus for our listeners. The goal is to make strength testing accessible, practical, affordable, and easy to conduct for any ACL athlete or clinician wanting to objectively test strength.
What’s up guys, and welcome back to another episode on the ACL Athlete Podcast. Today is episode number 47, and we are continuing the two-part series talking about strength testing in ACL rehab. Today, we are doing part two. It is focused on the solution, which last week we talked about in part one the problem related to strength testing in ACL rehab. We talked about the statistics. We dove into some research studies, talking about the big problem which is the re-injury rates and return to sport rates, which are re-injury rates are super high and return to sport rates are really low. And in a nutshell, we just need to improve these numbers. And when we ask why, a big factor in this is testing, and specifically knowing where our strength is, whether that’s our quadriceps strength or our hamstring strength. Our overall strength is going to be really important and a really big factor when playing into these different rates.
And if you’ve been following along on Instagram, that’s been the main focus right now, is talking about strength, some of the statistics, and some of the things that we talked about last week. And if you’re listening and haven’t listened to part one, please go and do that as it sets the foundation and it stresses essentially the importance of the why. It asks the question of why is it so important to strength test and we answer that based on these rates; as well as maybe factors that play into why testing is not happening. And this comes back to the rehab professional, whether that’s you listening or if that’s who you’re working with. And when we look at these different factors, whether that’s time, insurance, laziness, lack of resources, lack of knowledge, those were the main things that we looked at.
And when we look at time; it only takes 5 to 10 minutes, especially with a handheld dynamometer or isokinetic machine. Insurance: We need measurements and outcome numbers. This is actually plausible for insurance to be able to have these numbers. Laziness: I don’t know really what to say there. Lack of resources: There are tons of affordable options that we’ll talk about today, which can be anywhere from 100 to 200 bucks. And when we look at other things in the clinic and their price points, we know for sure that a physical therapy clinic can buy $100 to $200 worth of testing equipment. And if anything, if you work with a lot of ACL athletes, then it’s worth just making the investment on your own because of what it provides you. And then knowledge, that’s what we’re trying to close the gap on here, is education. Well, let’s make this easy, let’s make this practical, and let’s make sure that this isn’t a limiting factor here. And maybe it is the resource piece or timepiece that we can start putting together, okay, if I’m educated and I know how to do this, and what to use, then maybe I can be more efficient with my time and be able to buy something that is more cost-effective, to be able to get objective strength measurements for ACL rehab.
When we’re talking solution here, we’re asking the question why. We covered that in part one, which is the problem. And when we talk about the what, what is strength testing? We have to take a step back here and we have to focus on actually defining strength and what we’re looking at since that is the goal, and that’s a big bucket that we’re trying to cover here.
What is strength? What you’ll commonly hear is that it’s the ability to exert force on an external object or resistance. And it’s not always straightforward and can be different based on what the task at hand is. We need to get more specific. Is it maximum strength? Is it explosive strength or power? Is it reactive strength which is a bit more elastic in nature? These specific qualities of strength are going to be really important and we have to be able to define: what is it that is related to ACL rehab that’s important? While all of these are along the continuum and important to build, we’re going to be focusing mostly on maximum strength and force output which is what we’re measuring typically with these tests to know, okay, what is our ceiling of the maximum output of force? And so then that’s going to lead us to peak torque. And we’re specifically talking about the quadriceps which is typically referred to as a knee extensor mechanism. Because you have the quadriceps muscle which is the thigh muscle, but then you have your kneecap, you have your patellar tendon, your quadriceps tendon, that’s called the knee extensor mechanism. And that’s going to contribute to the output that you are producing, not just the quads by itself. And then there’s the opposite of it, which is the hamstrings, which is the knee flexor mechanism that contributes to knee flexion, or the hamstring muscle group that we’re trying to test, along with those tendons and different structures back there.
How we test can come in many different forms. The most common options are an isokinetic dynamometer which technically can be called the electro-mechanical dynamometer; a handheld dynamometer which can be referred to as a push or a pull; and then repetition maximum. Those are your most common three measurements of strength, if you will, that you will see in ACL rehab. Dynamometers themselves, measure force. And we take that force and we calculate it to be able to find our torque, which is force times moment arm. And this gives us an objective strength measure that we can use and is very valuable and use in a lot of the research.
And if we’re talking about these three different types of options, the isokinetic dynamometer is the gold standard. It also costs anywhere from $25,000 to $50,000 for one of these machines. It will give you everything that you can imagine in terms of strength testing, measurements, you can even do exercises on it which is really cool. But the difficult part is that they’re expensive, they’re hard to access and that makes it really difficult to be able to make it practical for most clinics. Because most clinics don’t have one and they don’t have the budget nor the size to be able to support it. The budget may be questionable. But convincing an owner or a corporate owner to get one of these, especially for even a used machine is around $25,000, that’s a pretty penny.
But then if we kind of drop down to the next level, we have handheld dynamometers or push-pull dynamometers, which use a load cell to sense force. They’re super tiny and there are so many options to these that we’ll talk about. But research shows us that these devices give force values that are equivalent to measures given by isokinetic dynamometers. They’re valid, they’re reliable, they’re repeatable. And if we can do that at a fraction of the cost, then why not do it. Most of them range anywhere from – you can get a cheap crane scale for 50 bucks off of Amazon, And you can get these other ones that will mention that are 140 or even all the way up to 850 bucks for a nicer dynamometer, that gives you way more calculations and force time curves. And guess what? They’re easily accessible, you can transport them, and the setup isn’t complicated whatsoever.
Then finally, we have our repetition maximum. And this is typically the easiest to access since most gyms or clinics will have knee extension machines and hamstring curl machines. The thing that’s difficult with this is that you’re not going to be doing a one-repetition max of knee extensions, probably anytime early in your ACL rehab. And when you try to think about doing a one- repetition max of a knee extension, that just sounds brutal. Sure, it can be daunting, but it also just kind of sounds brutal for the knee. And you’re probably moving your body all about to be able to get that value anyways. What I end up doing is telling people to aim towards a 5 to 10-repetition maximum instead, depending on where they’re at. And this needs to be specific to you. You need to consult with a healthcare provider that you’re working with, to make sure that you are cleared to be able to do this whole knee extension machine. That’s a topic in and of itself, and depending on the clinic and who you’re working with, can have certain opinions about it. They’re safe machines, but it needs to be progressed in a certain way. It’s also important to know that you’re not getting peak torque from this like the dynamometers. They’re providing force which you can create a value of torque from, by taking the moment arm and multiplying it by the force output.
With that said, even though the repetition maximum, there might be more errors, or it might not be necessarily the specific output we’re looking for, we can still compare side to side which is valuable. It is better than an MMT; it really is. Please just don’t use an MMT to be able to say you’re strong enough. And that’s my most important stressor here. This is something that I learned from Eric Mira, which is just knowing that each testing method will have its own limitations. And he says, “the test test what the test test.” If you’re testing knee extension machine, you’re testing knee extension. This does not mean that you’re testing torque, this does not mean that you’re testing force. It’s just testing what the test tests. There’s limitations to all of these. And you have to know that when you are testing objective strength.
Now, let’s talk about when should you test for strength in ACL rehab. And it’s going to vary a lot. And it’s going to depend on where people are at in the process and what they have access to. But for me and my athletes, we use data and we use based on our key performance indicators or KPIs from our assessment and this testing, and it’ll direct our next training block or our rehab series block. And we use this to consistently reassess and make sure that we are hitting certain KPIs and milestones. And as we enter certain phases, we need to meet certain entry and exit criteria and meet these KPIs to move forward. And these are typically anchored to limb symmetry, normative data, and body weight ratios, which we will talk about towards the end.
But here are some examples of some times that I may test strength with my athletes. But no, it’ll vary a good bit based on phases and where people are at. Pre-surgery: So that is prehab. Typically on the uninvolved side. Sometimes we’ll do the involved side, depending on what it is and maybe the hamstrings. Timing: Every four to six weeks in some sort of way, shape, or form. The minimum is every 12 weeks or three months. Major milestones: Initiation of plyometrics, return to running, initiating some sprinting, change of direction work. And then especially when we’re getting into later phases, we do more testing to make sure we can continue from that participation of your sport to all the way return to sport and performance continuum.
And lastly is the training block, at the end of each training block, I want to know where my athletes sit in terms of strength levels. So that might be a one to five repetition max, especially for my remote athletes who don’t have access. It might be an AMRAP (as many reps as possible). Maybe it is peak torque depending on where they’re at and what they have access to. But I think it’s important to know that if it is a well-designed strength and conditioning and rehab program, that this can be built in without it directly being affected of like, oh, here’s a test week. Maybe something that is a bit more strategic, where the last week or maybe a certain week is going to fail on a certain movement or an RPE 10 or zero reps in reserve. But it can be built out to make sure you don’t hit any test anxiety or feeling like this test week has so much lying on it. Instead, it could just kind of be weaved into the program. And so having a framework is going to be important in these feedback loops to be able to anchor this process.
And our testing should inform our program design. It’s very important that it informs what we’re building for the next cycle. And we continue to test to know, okay, what KPIs are important for this phase, and keeping the end goal in mind and making sure we’re working towards that. So that’s going to be really important in this process in terms of knowing when to test. As a rule of thumb, worst-case scenario, you want to test at least every 8 to 12 weeks in some shape or form, depending on where you’re at. And it can help to really guide this process to know: Okay, am I getting close to these percentages that I need to? Which we usually use as 90% of symmetry which we’ll also talk about at the end.
Now, let’s talk about how to strength test. And we need to talk about equipment here because that’s what’s going to be really important. And specifically, we’re going to talk about handheld or the push-pull dynamometers for objective strength testing. And we’re going to focus solely on isometric peak torque or force, if you will, for the quadriceps and hamstrings. It’s the easiest to replicate, it’s the easiest to reproduce. And that’s what you see, reference a lot in research studies. When we talk about isometrics, it essentially means we are not changing the length in our muscles. If you imagine your foot kind of kicking into a wall and it doesn’t move, but you could feel your quadricep kicked up, then that’s an isometric. If you were to bend your elbow to 90 degrees and push on your wrist and flex your bicep but it doesn’t move, but you’re feeling your bicep; that’s an isometric. An isometric peak force – so we’re kicking out as hard as we can without moving our leg at all. This is something that we test a lot in ACL rehab for hamstrings and quadriceps. And it’s easy to do in any physical therapy clinic. Or, if you’re an ACL athlete and you’re like, hey, I want to do this on my own. I’m going to spend this money and I want to continue to test it and know where I’m at. Well, here you go. Here’s the way to do it.
What equipment do you need? An inline dynamometer. The dynamometer is the one that measures force and is often referred to as a handheld dynamometer. It can be a push or a pull. In this instance, you’re going to need the pull to be able to sense the load that measures output for force. And because of how much we kick out it’s going to be hard for someone to push against it. You need a pull dynamometer. You need a carabiner which is a closed hook to anchor all the equipment together. You don’t want an open hook because when you take the slack out, you don’t want it to slip. You need an ankle strap that is comfortable and padded, a wide strap, ideally. That way it doesn’t cut into your ankle or your skin, and that doesn’t impact the results that you get. And then you need a strong and rigid metal or daisy chain or even a lash strap that you can connect to the equipment that we had just mentioned.
Now, I’m going to break down my setup for you guys so that way you can see the actual cost. The dynamometer that I have is a 10-deck, and I’ll talk to you about that at the end. But a 10-deck is 140 bucks. I have two chains that cost me $20 off of Amazon. Carabiners which are 10 bucks. I recommend getting at least four of those. And then I got a DMoose ankle strap which was 10 bucks. So that all in all is 180 bucks, for me to test every single one of my ACL athletes with this dynamometer. It’s awesome, and it’s less than 200 bucks. I can do it for the hamstring and I can do it for the quadricep. If you want options, then I suggest going to the Instagram post where I talk about equipment essentials. I’m actually going to link that into the show notes so that way you could see it. I want you guys to be able to know: Okay, here are some options, as well as being able to visually see it because that will help a lot. I’m going to put that into the show notes so you guys have it.
And then the last few points that I want to make is talking about the principles of actually conducting it and setting it up which are going to be very important. And then we could talk about some of the values. So whenever we are setting this up, I want you to think about some principles.When we do this, we want to think about how can we make this as rigid as possible. We want to try and isolate one specific joint, and that’s it.
When you look at an isokinetic machine, that thing locks you in and only allows your knee to move. That’s the goal so we can reduce as much noise as possible. We need it to be as rigid and we need it to be repeatable and reliable. If you make it reliable, then it’s going to be easy to repeat. It’s been proven in multiple research studies that it is a valid use of measuring force output similar to an isokinetic dynamometer, especially isometric peak force, and being able to get torque from that. We know that the values are very similar. And so then that gives us leeway to be like, okay, we don’t need a $50,000 machine.
We can use something that might be around 100 bucks or up to 800 bucks, and we can still get a very similar output. And these numbers that we’re looking at for return to sport, for re-injury rates, and that we can use in the clinic. To make this as rigid as possible, we might need a thigh strap or a buckle to be able to put on our thighs and on our hips to be able to make sure we don’t come out of the chair. We wanted to make sure that we take the slack out of the system. We could take a band to make sure that when you go to kick out that you’re not going to ramp up and take the slack out and just kick out automatically, and you’re almost at that endpoint already to reduce as much noise. And that’s the main thing here. How can we reduce noise to make sure when we get this force output, it’s actually the force output and it’s not compensating with our bodies or they’re slacking in the system, or our knee is popping up. So that’s what’s going to help us stay consistent throughout this entire process.
Now, for actually conducting the actual test itself. And it’s going to be a little different on the quadriceps versus the hamstrings. But 90% of it is actually going to be pretty similar in terms of the way that the setup is and even the queuing. When we go into this, you want to be seated in a chair. You want to make sure that the thigh and the hips are strapped down. And you want to make sure the hands are either gripping the side of what you’re seated on or crossing your arms. And then the ankle strap is going to be right around the ankle bone, typically right above. And you want to make sure that is something that is comfortable, it doesn’t dig in. And then in terms of angle, you have options. You want to make sure that your thigh and your shin bone or your lower leg bone make an angle of 60 degrees or 90 degrees at your knee. A 90 degrees is easy because it’s just a right angle, it’s easy to see it. Most of the research is tested at 60 degrees because that’s where we have the most optimal overlap of our length tension, and our muscles, and our quads. So that’s why we test at 60 degrees to get the most force output. But if 90 degrees is easier, then do it that way. You just want to make sure that whatever you pick, the goal is to be able to reproduce it very easily. Because that’s going to give you different values if you do one time at 90 and one time at 60. Keep it the same regardless of what you do.
You’re going to do some warmup reps anywhere from maybe three to five, and you’re going to build up from 50% to 100% intensity, and you’re going to want to make sure you rest. You can rest anywhere from 30 seconds to a minute, to a minute and a half. This is always going to vary based on the time that you have available, as well as the protocol that you want to follow specifically. And then you’re going to test and you’re going to do anywhere from two to five max effort tests. And you’re going to be cued as kick as hard as possible, and the goal is to build up over three seconds and hit peak in five seconds. You want to build up for three seconds, and then your goal is to hold that peak as hard as you can for five seconds and then slowly ramp down. And you’re going to try and do that for two to five reps and making sure you at least get anywhere from 60 to 90 to 120 seconds of rest between each rep. Because we want to make sure that we get a true indication of that force output. If we do three reps within 10 seconds of each, you’re not going to get that full-force output because you didn’t let their muscle rest like it needs to. We need to make sure we have adequate rest. But again, depending on your time, you might want to just rest anywhere from 30 seconds to 60 seconds and hit maybe two to three reps max. I usually aim for three reps for each athlete. If the numbers are all kind of off, then we’ll make sure we get some more. But if they’re kind of hitting very similar values, then we’ll stop at three. And then when we measure, you want to take the best effort instead of the average. And that’s because of what most of their research shows. I will take the best value as long as they’re all pretty similar. And then we will use that value to calculate torque, which is the number that we want. And this is what we are looking at for comparing side-to-side differences and what a lot of the research shows.
And this is something that Scott Morrison is brilliant on – I’ve learned so much from him; and Eric Mira and my Georgia State professor; Dr. Sai. They have all helped me to be able to learn this process and be able to see how it looks and how in reality we can use it to apply to our ACL athletes. Scott actually has a torque calculator that I’m going to put in the show notes because it’s very helpful. He’s a smart man and it’s very valuable to be able to just put these numbers in and make sure you measure that moment arm which is going to be the center of the knee, where you’re rotating to where the center of that ankle strap is going to be. And that’s going to be the distance of your moment arm, typically in centimeters or meters, depending on what you need to convert.
Now, ACL athletes, I don’t expect you guys to go out there and calculate all these things. Ideally, the physical therapist that you’re working with will look at this. If not, then if you are able to find some of these numbers, even the raw force output in kilograms or pounds, you can always send it to me. And I’ll let you know: Hey, this is what it looks like based on your torque, and here’s your actual value. And we will be able to assess it from there. But to anchor these numbers is really important. You’re just like, okay, well here’s the number. Great, what do I do with it? With the numbers, our goals are our data for these goals and numbers is essentially 90% to 95% limb symmetry index. And that’s what you’ll hear a lot is this 90%, how can I get this ACL (the injured side or the operated side) whatever you want to call it, the ACL side? And how can I compare that to my uninjured, unoperated side? And that’s the goal. We’re trying to get within 90% of that, and that’s what a lot of the research shows that it lowers re-injury rates, and allows the athletes to get back to sports safely and faster compared to people who don’t hit these numbers. We talked about those back in the other episode. We’re trying to aim for 90% limb symmetry index. And if you want a simple calculation, it’s taking that number of the operated side, and then you want to divide it by the unoperated side, and then just multiply it by a hundred, and that will give you the percentage of where that knee is at.
And then if you look at different resources, there are certain ones that will look at, okay, we need two to three to maybe four times body weight of strength to be able to do X, Y, and Z. While there are very good values out there of being able to hit certain numbers, what you need to think about is how much force that you’ll be experiencing in your body, as well as how much force may be in a contact sport or whatever sport you play. And we need to make sure that we are working towards that of what those stresses you’re going to be experiencing.
Two specific things will typically see in the research. Iwame came out with a study this year, actually that showed, if you can hit 1.45 Newton meters per kilogram body weight, that people had a better experience and better outcomes related to running. If they were below that, they typically had issues and they carried that on for much longer. So that gives us a number for running which is a very big milestone in this process. And then if we’re talking about the full return to sport, the number that tends to stick out that you see in the research is three Newton-meters per kilogram body weight for return to performance, sport, and play. This is the number that we’re after because this is going to put it relative to your body weight. The thing with the symmetry is that while it’s good to get above 90%, if we’re comparing it to the unoperated side that might have gotten weaker during this process.
And there’s been studies that have shown that that side does get weaker over time because there’s so much either focus on the operated side or the injured side. What happens is, is that the unoperated or the uninjured side will decrease in strength. And then we’re comparing the operated to a weaker leg, then that 90% is a lower target for that operated side. I hope I didn’t lose you guys there. But that’s the main important thing is that if it’s relative to the other leg, then you might have just be comparing to two weak legs. Instead, if you can normalize this to body weight, which is where the 1.45 Newton meters per kilogram and the three Newton meters per kilogram can be so helpful to know, okay, this is. ..No matter what, we are taking this based on you as a person relative to you, to be able to know, okay, you’re ready to go. Even, if they’re two weaker legs, it’ll show it, with this based on your body weight. And so that’s what we’re trying to aim for here when we get these measurements.
And then one other option that I do want to talk about is repetition maximums, because I know it’s still going to be an issue to be able to test this and get this, or maybe you’re just like, this is too much of a setup, I’m not a PT. I get it. So then what else can you do? That’s where the repetition maximums can be valuable. But as I had said earlier, you want to make sure you consult with a professional on this and not just go hand on some knee extension machines. And then your knees are bugged out or something happens. What you can do is start with a higher number, maybe 10 reps, 15 reps and compare side to side. And the thing with this is that the further away from one repetition maximum you go, the more error it creates. So just know the further you are, you might have some room for error, it might not be as accurate.
And then, if you can move, and as you get further in this process, you can start working on a five-repetition max. So let’s say, for example, you want to see where your quads and your hamstrings are. One simple thing that I get most of my athletes to do, especially remote ones, is they will sit on a knee extension machine, if given the right time. We’ll get them to do a five-repetition maximum on a single leg, on one side versus the other. And that’ll even let us know, okay, how does it compare side to side from a number standpoint, from a weight standpoint, from a how does it feel specifically. And then that way we can at least get something that is objective and that gives us some sort of symmetry or asymmetry side to side. And we know, okay, we need to work on this. Or even if it creates pain, perhaps then maybe that’s something we know, okay, we need to work on this knee extension to reduce the pain and increase the force output.
These are some of the things that I want you guys to think about related to strength testing. And I just come in here and talk about the solution and what are things that are practical that any clinic can do. And any of you ACL athletes out there, depending on where you’re at, that you can do as well. And it could be as affordable at $100 to $200 to be able to find most of this equipment. And most of it you get from Amazon. The dynamometer, you might have to get somewhere else. But there’s even a crane scale that’s 50 bucks on Amazon that you can get. Just make sure that if you get it you are able to hold that high value. There are some that only fluctuate back and forth, so then you might have to record it to be able to get that peak value. Otherwise, you need one that says, hold on it in order to get that high value that you’re looking for.
Now, as we finish up for today, one announcement I want to make is that we’re doing a giveaway on Instagram for anyone who enters the contest. ‘We’re teaming up with 10-deck to be able to give away one progressor, as well as some other bonuses, which is the app that it comes with.
I’ve made a step-by-step knee strength testing guide, as well as a torque calculator that you get to download on your own and you can keep. This will be something that you’ll be able to get. And the way that you’re going to enter this is you got to go to the Instagram post, you got to tax some people, do some follows, the whole giving deal. I’ve cut this off at midnight on Thursday, but for you ACL athletes and clinicians and everyone out there who’s listening, through this podcast, I’m actually going to extend this until later into the 24th. And then I’m going to announce later on Christmas Eve, who is the winner. That’s one bonus to all of you listeners, is that you get to extend and be able to add more entries than most other people are not going to get. And if you don’t want to wait, or let’s say you do not get the Tindeq and you don’t win it, I’m sorry. Here’s also a heads up that you can go to Tindeq website. And the way you spell Tindeq is T-I-N-D-E Q. And if you put Tindeq Deck Progressor into Google, it’ll come up. But you can also get $10 off your order. And these 10 decks are 140 bucks. They get shipped anywhere in the world. And if you put in the code, Ravi Patel, you get 10 bucks off so that drops it to 30. And you can have a pool dynamometer with a cool app that you can use anywhere for your strength testing. I even use it for athletes with rehab to be able to hit certain peak measures and isometrics and things like that.
It’s a very valuable product and if it’s something that interests you, snag it up or enter the contest. We talked about the problem in part one and today was all about the solution. While this is not fully comprehensive, I want it to be as practical as possible in talking about the what, the why, the where, the how, the when, all the different things that are going to be important to factor in so you guys can be set up as best as possible in this process. Making sure that we are hitting those specific KPIs and that this testing is informing your programming and therefore you can get back to the sport and reduce the re-injury rate and not be so fearful of the knee. And to be able to ultimately live your life without worrying about one side being weaker than the other, and being fully confident.
Go and check that out. I’m going to put the giveaway link in the show notes so that way you guys can access it. Go and put your tags in, and then that way you can have a chance to win it. And if you have any questions or if you want feedback on your calculations or you’re trying to figure out: Hey, these are my options, what should I do? Shoot me a message. But that’ll do it for today, guys. Thank you all so much for listening and for following me on this strength testing journey. Everyone’s getting all the info on strength testing in ACL rehab. It’s a big problem. I want to make sure that there are practical, realistic solutions that we can use every day and not have to worry about accessing a $50,000 machine so that way we can make sure we change these rates where we decrease re-injury risk and increase the return to sport rates. So that’s my hope for this and that’s my hope for all you ACL athletes out there. So that’s it. Thank you, guys. Until next time.
Subscribe and leave The ACL Podcast a review – this helps us spread the word and continue to reach more ACLers, healthcare professionals, and more. The goal is to redefine ACL rehab and elevate the standard of care.
Resources:
- Check out our free ebooks on our Resources page
- Sign up for The ACL Athlete – VALUE Newsletter – an exclusive newsletter packed with value – ACL advice, go-to exercises, ACL research reviews, athlete wins, frameworks we use, mindset coaching, blog articles, podcast episodes, and pre-launch access to some exciting projects we have lined up
- 1-on-1 Remote ACL Coaching – Objective testing. An individualized game plan. Endless support and guidance. From anywhere in the world.
- More podcasts? Check out our archives
Connect: